OS X
OS X Yosemite Coming to the Mac- Here Are the Highlights...
13/06/14 22:33
The second part of last week’s event covered the Mac.
As with iOS, Apple is now launching a new operating system for the Mac once per year.
The new version is called OS X 10.10 Yosemite and here is a run down of the highlights:
1/ New Design:
The first thing which will strike you is the look of OS X Yosemite- the font used in all of the menus has changed and the Dock and icons are also new.
Here is an example of the new look for the Dock:

Here is an example for the new folders and files:

Here is how the top left of a Safari window now looks- with a slim, refined set of buttons:

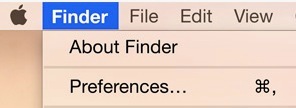
Here is an example of the translucent menus with their new (thin) font:
2/ Notification Centre:
The Notification Centre has been expanded and there will now be a “Today” view, showing all of your events and reminders for the day. This means that you can glance at your day with one click, without having to launch the Calendar app:

3/ Phone Calls and SMS:
One of the coolest features is the integration between your iPhone and Mac. If you receive a call when sitting at your Mac, a notice will pop up on your Mac screen asking you if you wish to accept or decline the call. If you accept, you can speak to the person through your Mac speaker/microphone, without having to take the phone out of your pocket/bag. Also useful if the phone happens to be charging in another room!
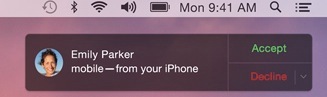
Under iOS 8, any call coming in to your iPhone will ring on your iPhone (!), Mac, iPod touch or iPad. So you can answer or decline that call on any device.
As we saw earlier in iOS 8, you can also read and reply to your SMS messages on your iPhone, iPad, iPod or Mac. Up to now you could only do this with the blue iMessages- but under Yosemite you can send green SMS text messages.
4/ Handoff:
With the new handoff feature, when you return to your Mac you can click on a button to carry on what you were just doing on your iPad or iPhone. So if you were in the middle of an email on your iPhone, clicking the Handoff button will bring that email up on your Mac where you can continue to work on it. This works both ways- for example, continue to work on a Pages file on your iPad if you have been working on it on your Mac.
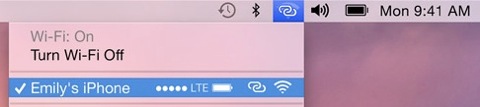
5/ Hotspot:
Hotspot mean that your Mac can connect to your iPhone and use its data connection. This is great if you are out and about with your laptop- just use the hotspot feature to allow your Mac to connect to the internet through the iPhone. No fiddling around with settings.
6/ Mail:
In the Mail app under OS X Yosemite, you can edit and fill out PDF forms inside an email message- great when someone sends you an attachment and asks you to mark changes or complete a page.
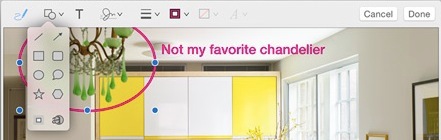
This includes signing a PDF, so you can read the PDF and add your signature without having to leave your Mail app.
7/ AirDrop and iCloud Drive:
With the new version of AirDrop, you can send a file between your devices- for example you can take a PDF from your Mac desktop and drop it over to your iPhone. No more emailing a file to yourself! You can just drag and drop this over to your iPhone or iPad.

As with iOS 8, iCloud Drive comes to Yosemite and you can arrange all of your files in your iCloud Drive from the Finder. Think of this as Apple’s version of Dropbox- you can make folders and drop your files into them, then head off and access these on your iPod, iPhone or iPad.
——
A couple of footnotes:
- OS X Yosemite will run on any Mac which can run the current OS X 10.9 Mavericks.
- As a run of thumb, this is any Mac from about 2008 onwards.
- OS X Yosemite will be a free upgrade.
For a 30 second preview of the look and feel of OS X Yosemite, have a look at this Apple video:
http://www.apple.com/osx/preview/video/
Dr. Simon Spence / 2014.
As with iOS, Apple is now launching a new operating system for the Mac once per year.
The new version is called OS X 10.10 Yosemite and here is a run down of the highlights:
1/ New Design:
The first thing which will strike you is the look of OS X Yosemite- the font used in all of the menus has changed and the Dock and icons are also new.
Here is an example of the new look for the Dock:
Here is an example for the new folders and files:
Here is how the top left of a Safari window now looks- with a slim, refined set of buttons:
Here is an example of the translucent menus with their new (thin) font:
2/ Notification Centre:
The Notification Centre has been expanded and there will now be a “Today” view, showing all of your events and reminders for the day. This means that you can glance at your day with one click, without having to launch the Calendar app:
3/ Phone Calls and SMS:
One of the coolest features is the integration between your iPhone and Mac. If you receive a call when sitting at your Mac, a notice will pop up on your Mac screen asking you if you wish to accept or decline the call. If you accept, you can speak to the person through your Mac speaker/microphone, without having to take the phone out of your pocket/bag. Also useful if the phone happens to be charging in another room!
Under iOS 8, any call coming in to your iPhone will ring on your iPhone (!), Mac, iPod touch or iPad. So you can answer or decline that call on any device.
As we saw earlier in iOS 8, you can also read and reply to your SMS messages on your iPhone, iPad, iPod or Mac. Up to now you could only do this with the blue iMessages- but under Yosemite you can send green SMS text messages.
4/ Handoff:
With the new handoff feature, when you return to your Mac you can click on a button to carry on what you were just doing on your iPad or iPhone. So if you were in the middle of an email on your iPhone, clicking the Handoff button will bring that email up on your Mac where you can continue to work on it. This works both ways- for example, continue to work on a Pages file on your iPad if you have been working on it on your Mac.
5/ Hotspot:
Hotspot mean that your Mac can connect to your iPhone and use its data connection. This is great if you are out and about with your laptop- just use the hotspot feature to allow your Mac to connect to the internet through the iPhone. No fiddling around with settings.
6/ Mail:
In the Mail app under OS X Yosemite, you can edit and fill out PDF forms inside an email message- great when someone sends you an attachment and asks you to mark changes or complete a page.
This includes signing a PDF, so you can read the PDF and add your signature without having to leave your Mail app.
7/ AirDrop and iCloud Drive:
With the new version of AirDrop, you can send a file between your devices- for example you can take a PDF from your Mac desktop and drop it over to your iPhone. No more emailing a file to yourself! You can just drag and drop this over to your iPhone or iPad.
As with iOS 8, iCloud Drive comes to Yosemite and you can arrange all of your files in your iCloud Drive from the Finder. Think of this as Apple’s version of Dropbox- you can make folders and drop your files into them, then head off and access these on your iPod, iPhone or iPad.
——
A couple of footnotes:
- OS X Yosemite will run on any Mac which can run the current OS X 10.9 Mavericks.
- As a run of thumb, this is any Mac from about 2008 onwards.
- OS X Yosemite will be a free upgrade.
For a 30 second preview of the look and feel of OS X Yosemite, have a look at this Apple video:
http://www.apple.com/osx/preview/video/
Dr. Simon Spence / 2014.
Comments
Guide: How to setup an encrypted USB stick
26/07/13 14:17
Here is how to setup an encrypted USB stick under Mountain Lion 10.8:
1/ open Disk Utility (Macintosh HD -> Applications -> Utilities)
2/ insert your USB stick and select it on the left hand side of the Disk Utility window. Be careful to select the USB stick and not some other disk such as your backup drive!
3/ with the USB disk selected, click on the “erase” option on the right and set the options as shown here:
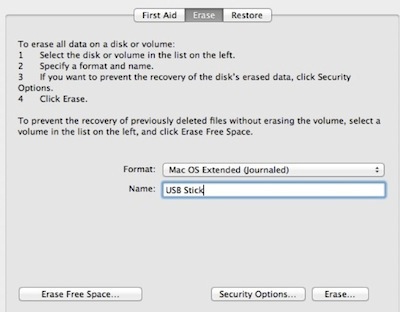
Choose “Mac OS Extended Journaled” and type in a name for your stick.
4/ now click on the “erase” button at the bottom to completely erase the stick.
5/ quit out of Disk Utility.
6/ find the USB stick on your desktop- hold the ctrl key down on the keyboard and click once on the USB stick icon
7/ choose “encrypt xyz” from the pop-up menu to start the process.
8/ you will be asked to enter your encryption password and a hint:
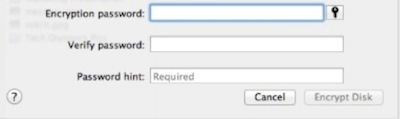
Be careful when doing this because if you forget this password you will not be able to access this drive!
9/ once you have entered the password twice and entered your hint, click on the “encrypt disk” button. This could take a long time. There is also no progress bar telling you how long it will take. Let this process complete and don’t interrupt it.
10/ once completed, eject the disk reconnect it again. You will then be challenged for the password before you can see the disk on the desktop. Enter the password and now copy your material onto the disk.
This will protect your USB drive should you lose it. Encryption means that it is virtually impossible for anyone to crack the password and see your files. It will just give peace of mind for sensitive information. .
1/ open Disk Utility (Macintosh HD -> Applications -> Utilities)
2/ insert your USB stick and select it on the left hand side of the Disk Utility window. Be careful to select the USB stick and not some other disk such as your backup drive!
3/ with the USB disk selected, click on the “erase” option on the right and set the options as shown here:
Choose “Mac OS Extended Journaled” and type in a name for your stick.
4/ now click on the “erase” button at the bottom to completely erase the stick.
5/ quit out of Disk Utility.
6/ find the USB stick on your desktop- hold the ctrl key down on the keyboard and click once on the USB stick icon
7/ choose “encrypt xyz” from the pop-up menu to start the process.
8/ you will be asked to enter your encryption password and a hint:
Be careful when doing this because if you forget this password you will not be able to access this drive!
9/ once you have entered the password twice and entered your hint, click on the “encrypt disk” button. This could take a long time. There is also no progress bar telling you how long it will take. Let this process complete and don’t interrupt it.
10/ once completed, eject the disk reconnect it again. You will then be challenged for the password before you can see the disk on the desktop. Enter the password and now copy your material onto the disk.
This will protect your USB drive should you lose it. Encryption means that it is virtually impossible for anyone to crack the password and see your files. It will just give peace of mind for sensitive information. .
New OS: OS X Mavericks
21/06/13 17:50
Just when you got over the shock of the new iOS 7 for iPhones and iPads, there was a second announcement last week...
Apple previewed OS X Mavericks, the next operating system for your Mac.
[Having run out of big cat names such as Lion, Panther, Cheetah, they have now started to name their Mac operating systems after Californian locations].
OS X Mavericks will arrive this autumn, around the same time as iOS 7, and will cost approx. €10-15 (price not yet confirmed).
Here is a quick summary of some of the changes and new features which Apple announced:
1/ Calendar:
Hate the leather trim in the current OS X Calendar app? You are in luck! The new version of Calendar has a cleaner more simplified look:
Current calendar trim under Mountain Lion:

New look under OS X Mavericks:

Calendar will also integrate maps, so it will give you an estimated travel time to your appointment plus a map of where the event is to be held.
Read More...
.
Apple previewed OS X Mavericks, the next operating system for your Mac.
[Having run out of big cat names such as Lion, Panther, Cheetah, they have now started to name their Mac operating systems after Californian locations].
OS X Mavericks will arrive this autumn, around the same time as iOS 7, and will cost approx. €10-15 (price not yet confirmed).
Here is a quick summary of some of the changes and new features which Apple announced:
1/ Calendar:
Hate the leather trim in the current OS X Calendar app? You are in luck! The new version of Calendar has a cleaner more simplified look:
Current calendar trim under Mountain Lion:
New look under OS X Mavericks:
Calendar will also integrate maps, so it will give you an estimated travel time to your appointment plus a map of where the event is to be held.
Read More...
.
Tip: Dropbox Guide
18/06/13 11:11
Here is our short guide to sharing with Dropbox:
To share a folder with another Dropbox user:
1/ open your Dropbox folder on your Mac
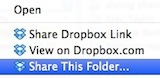
2/ ctrl-click on the folder inside your Dropbox
3/ choose “Share this Folder” from the pop-up menu:
4/ you will be redirected to a web page with these details:
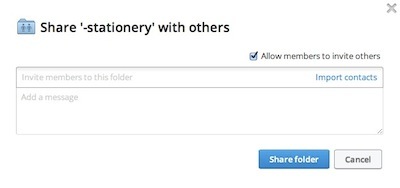

Enter the recipients email address and a note, and you can tick or un-tick the option to let the other person invite people to share this folder (probably best to leave this un-ticked so you control who gets invited).
5/ click "Share Folder" and you are done- they will get an email asking if they want to share. When they click on that link and accept, you will get a email telling you they have joined in.
To share a single file with a non-Dropbox user:
1/ ctrl-click on the file you wish to share inside your Dropbox
2/ choose “Share Dropbox Link” from the pop-up menu:
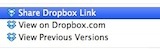
3/ the link is now copied to your clipboard (the memory of the Mac)
4/ now paste the link into your email or other document. You can also test it by pasting it into a Safari window and pressing return- this will sow you what your recipient will see when they use the link.
Note: when the other person receives the link they should click on the “download” or “direct download” button. They do not need to sign up for or sign into a Dropbox account to use this service.
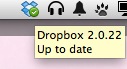
To check that your Dropbox software is updated:
1/ hover over the Dropbox menu extra at the top of the screen- the yellow box will flash up telling you you version number- check this against the latest download from Dropbox: www.dropbox.com/install
:
2/ if you need to update, download it from the webpage
3/ now install the software. Don't just download- you need to open the downloaded file when it is ready and go through the steps to install.
4/ once finished you can check your version by hovering ver the dropbox menu extra at the top of the screen- the yellow box will flash up telling you if you are up to date.
.
To share a folder with another Dropbox user:
1/ open your Dropbox folder on your Mac
2/ ctrl-click on the folder inside your Dropbox
3/ choose “Share this Folder” from the pop-up menu:
4/ you will be redirected to a web page with these details:

Enter the recipients email address and a note, and you can tick or un-tick the option to let the other person invite people to share this folder (probably best to leave this un-ticked so you control who gets invited).
5/ click "Share Folder" and you are done- they will get an email asking if they want to share. When they click on that link and accept, you will get a email telling you they have joined in.
To share a single file with a non-Dropbox user:
1/ ctrl-click on the file you wish to share inside your Dropbox
2/ choose “Share Dropbox Link” from the pop-up menu:
3/ the link is now copied to your clipboard (the memory of the Mac)
4/ now paste the link into your email or other document. You can also test it by pasting it into a Safari window and pressing return- this will sow you what your recipient will see when they use the link.
Note: when the other person receives the link they should click on the “download” or “direct download” button. They do not need to sign up for or sign into a Dropbox account to use this service.
To check that your Dropbox software is updated:
1/ hover over the Dropbox menu extra at the top of the screen- the yellow box will flash up telling you you version number- check this against the latest download from Dropbox: www.dropbox.com/install
:

2/ if you need to update, download it from the webpage
3/ now install the software. Don't just download- you need to open the downloaded file when it is ready and go through the steps to install.
4/ once finished you can check your version by hovering ver the dropbox menu extra at the top of the screen- the yellow box will flash up telling you if you are up to date.
.
Tip: Using GrandPerspective to Spring Clean Your Mac
08/04/13 10:32
Ever wondered where all of your hard disk space has vanished to? One great software gem is GrandPerspective, as it gives a quick overview of your hard drive and what is using up your space.
GrandPerspective is a free app which scans your HD (or home folder) and gives you a visual overview of the size of the files on your drive. After downloading the .dmg file (from this link), open it and drag the GrandPerspective app to the Applications folder. Then open it from Applications and when it opens, choose “Scan Folder” from the File menu and select your “Home” folder (the one with the house icon in the sidebar!).
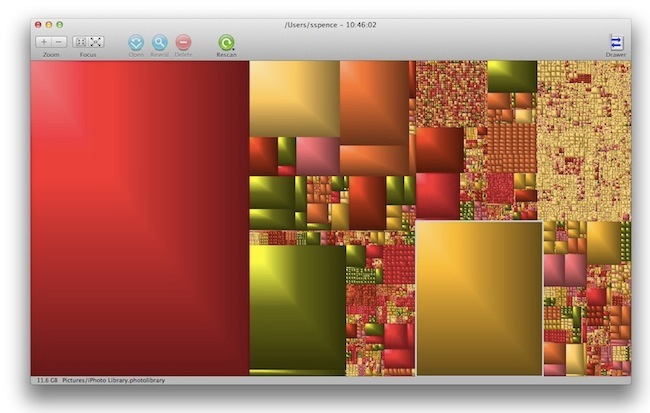
GrandPerspective will scan and then return a visual map of all of the files in your home folder. The large blocks are the memory hogs, the small ones are best left alone. It is likely that your iPhoto library will be one of the large pieces as it contains all of the photos and videos in your iPhoto app.
If you hover the pointer over the large blocks, it will give the location at the bottom of the window. This will help you to look for this file afterwards and possibly delete the file if it is no longer needed.
Remember that once you spring-clean your files, you need to empty the Trash can. Open the Trash and use the “Empty Trash” button in the top right of the window.
GrandPerspective is a free app which scans your HD (or home folder) and gives you a visual overview of the size of the files on your drive. After downloading the .dmg file (from this link), open it and drag the GrandPerspective app to the Applications folder. Then open it from Applications and when it opens, choose “Scan Folder” from the File menu and select your “Home” folder (the one with the house icon in the sidebar!).
GrandPerspective will scan and then return a visual map of all of the files in your home folder. The large blocks are the memory hogs, the small ones are best left alone. It is likely that your iPhoto library will be one of the large pieces as it contains all of the photos and videos in your iPhoto app.
If you hover the pointer over the large blocks, it will give the location at the bottom of the window. This will help you to look for this file afterwards and possibly delete the file if it is no longer needed.
Remember that once you spring-clean your files, you need to empty the Trash can. Open the Trash and use the “Empty Trash” button in the top right of the window.
Tip: Remove Adobe Reader As Your Internet PDF Viewer
24/03/13 10:10
One thing which always irritates us is when an application takes over and there is not an obvious way to stop it. Adobe Reader, Adobe’s PDF viewing application, does exactly this.


If you install Reader it will add some internet plugins for your Safari web browser. This means that when you click to view a PDF on a website, the document opens in the Adobe environment and not using Apple’s built-in Preview app.
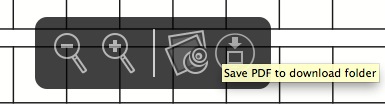
We like the Preview toolbar which appears over a PDF in Safari (above)- we particularly like the button which allows us to open that PDF in the Preview app.
To get rid of the Adobe system and return to using Preview as your default PDF viewer, you need to follow these steps:
1/ open your Mac HD -> Library -> Internet Plugins
2/ move the Adobe plugins to the Trash:

3/ quit and reopen Safari
It is a simple step but not that obvious. There is no option in the Safari extensions preferences to turn off Adobe Reader. However this simple clean-out should do the trick.
.
If you install Reader it will add some internet plugins for your Safari web browser. This means that when you click to view a PDF on a website, the document opens in the Adobe environment and not using Apple’s built-in Preview app.
We like the Preview toolbar which appears over a PDF in Safari (above)- we particularly like the button which allows us to open that PDF in the Preview app.
To get rid of the Adobe system and return to using Preview as your default PDF viewer, you need to follow these steps:
1/ open your Mac HD -> Library -> Internet Plugins
2/ move the Adobe plugins to the Trash:
3/ quit and reopen Safari
It is a simple step but not that obvious. There is no option in the Safari extensions preferences to turn off Adobe Reader. However this simple clean-out should do the trick.
.
If there is one thing you do this week...
10/03/13 22:09
If there is one step you take this week, let it be a scan of your hard drive. Now of course we assume you backup on a regular basis because anything else is sheer stupidity or you have nothing of value on your Mac and welcome a hard drive meltdown with open arms...
Take a look in your Applications folder for Utilities, and then inside here you will find Disk Utility. Open it up, select your Mac HD on the left and then click on the “verify disk” button. Wait a few minutes for a result. All going well, you should receive a message telling you that the Mac HD appears to be ok. If you get a bad result, such as that the drive needs to be repaired, backup immediately- no excuses and no delays. With your information secured you can then look at repairing the drive using OS X Recovery.
You should run this every month to ensure you do not lose data. No point in thinking about this stuff after the event….
Backup, backup, backup!
16/02/13 12:23
We have come across too many people in recent times who do not backup. There really is no excuse- your files are being stored on an unreliable hard disk and so a good backup should be part of your Mac setup and not seen as an optional extra. Plus, since Leopard 10.5 it is easy to setup and simple to use. Apple’s Time Machine software means that your backups are automatic when you connect to your backup device.
Probably the best device to use in terms of simplicity is Time Capsule. Time Capsule works as your wireless network (or connects to an existing wireless network) and backs up your Mac hourly, when you are connected to your wifi. it costs around 300 euro for a 2TB model.
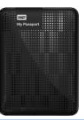
The second option is an external hard drive. We tend to go for the Western Digital My Passport drive, normally the 1TB model. It is cheap, compact, and connects to the Mac with USB. We don’t think that you need a high speed device as it is not really an issue with backups- if it takes 10 mins or 15 mins does it really matter? Backups work in the background so you won’t even notice when it is working away.
In terms of setup for a USB drive, it is simple- connect the USB drive and you will be prompted to use it as a Time Machine backup (assuming you are not already using another backup device). Choose to go ahead, and you may be asked if you wish to format the drive for your Mac (if it is a new drive). Proceed and the Time Machine backup will begin. It could take a long time for the first backup, depending on the amount of material on your Mac.
Setting up a Time Capsule device is a little more complex, but you are guided through the steps when you install the device using Airport Utility, Apple’s software for configuring their wifi devices.
Either way, make sure you have a good backup to hand. Otherwise it’s not a matter of whether you will lose information- it’s when!.
Probably the best device to use in terms of simplicity is Time Capsule. Time Capsule works as your wireless network (or connects to an existing wireless network) and backs up your Mac hourly, when you are connected to your wifi. it costs around 300 euro for a 2TB model.
The second option is an external hard drive. We tend to go for the Western Digital My Passport drive, normally the 1TB model. It is cheap, compact, and connects to the Mac with USB. We don’t think that you need a high speed device as it is not really an issue with backups- if it takes 10 mins or 15 mins does it really matter? Backups work in the background so you won’t even notice when it is working away.
In terms of setup for a USB drive, it is simple- connect the USB drive and you will be prompted to use it as a Time Machine backup (assuming you are not already using another backup device). Choose to go ahead, and you may be asked if you wish to format the drive for your Mac (if it is a new drive). Proceed and the Time Machine backup will begin. It could take a long time for the first backup, depending on the amount of material on your Mac.
Setting up a Time Capsule device is a little more complex, but you are guided through the steps when you install the device using Airport Utility, Apple’s software for configuring their wifi devices.
Either way, make sure you have a good backup to hand. Otherwise it’s not a matter of whether you will lose information- it’s when!.
Reeder and Readability: Ways to Manage News on OS X and iOS
23/01/13 14:59
Being able to read news stories each day, and catching up with all of the different articles that cross our path has always been a bit of a problem. For example we would need to visit 20 to 30 websites each day to pull together all of the news articles that we want to glance at concerning Apple.
The way we currently manage this is with a program called Reeder (with a second program called Readability in the background). Reeder gathers together the RSS feeds from each of the websites that we subscribe to.

Here are the steps to set this up for your sites/sources:
1/ set up a Google Reader account (www.google.com/reader). Although you won't be logging into the Google website very often, the Google Reader account forms the backbone of the system that is used for the Reeder application. Once you have set up a Google Reader account you will have set the new login email address and password. Now you are ready to use this in the Reeder application.
2/ the next step is to buy and download the Reeder program from the Mac App Store. It is best to set it up on your Mac first as there will be a little bit of configuration going on and then you can install Reeder on your iOS devices later.
3/ once you download and install Reeder, you need to open it and login to your Google Reader account.
4/ you can add new subscriptions to all of the websites that you wish to use. In Reeder, choose "add subscription" is from the subscriptions menu at the top of the screen.
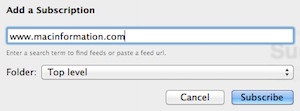
Once you click on the subscribe button, a green "subscribed" icon should appear, showing you are now connected:

Now you can keep adding all of your sites and they will feed headlines and news summaries to your Reeder app.
4/ when you wish to hold a couple of articles aside to be read later, it is best to send them over to the Readability app. In other words, Reeder is used for all fresh headlines and Readability if for digesting the couple of articles which require more attention later in the day.
First you need to download the Readability up on your iOS device such as your iPad or your iPhone. Readability is not available for the Mac (except through Safari), so we find that we catch up on important articles in Readability on the iPad at the end of the day.
5/ next, you need a Readability account which you can set up the first time you use the app.
6/ now you need to return to the Reeder app, and you need to sign into your Readability account inside the Reeder application. In the Reeder menu, choose Preferences -> Services and enter your details. This now links Reeder to Readability.
7/ when you open Reeder it will download the headlines for each of your sites, pulling in any news since your last use of the app. When you tap on a headline and read it, it will disappear as it has been marked as "read". If you read the headline and think that you would like to read the rest of the content later, tap on the Readability icon to add it to the Readability app.
8/ you can open Readability at any stage and read the articles you have filed there.
Think of Reeder as a fishing net scooping up all of the headlines for you- and then Readability is reserved for the best of the catch..
The way we currently manage this is with a program called Reeder (with a second program called Readability in the background). Reeder gathers together the RSS feeds from each of the websites that we subscribe to.
Here are the steps to set this up for your sites/sources:
1/ set up a Google Reader account (www.google.com/reader). Although you won't be logging into the Google website very often, the Google Reader account forms the backbone of the system that is used for the Reeder application. Once you have set up a Google Reader account you will have set the new login email address and password. Now you are ready to use this in the Reeder application.
2/ the next step is to buy and download the Reeder program from the Mac App Store. It is best to set it up on your Mac first as there will be a little bit of configuration going on and then you can install Reeder on your iOS devices later.
3/ once you download and install Reeder, you need to open it and login to your Google Reader account.
4/ you can add new subscriptions to all of the websites that you wish to use. In Reeder, choose "add subscription" is from the subscriptions menu at the top of the screen.
Once you click on the subscribe button, a green "subscribed" icon should appear, showing you are now connected:
Now you can keep adding all of your sites and they will feed headlines and news summaries to your Reeder app.
4/ when you wish to hold a couple of articles aside to be read later, it is best to send them over to the Readability app. In other words, Reeder is used for all fresh headlines and Readability if for digesting the couple of articles which require more attention later in the day.
First you need to download the Readability up on your iOS device such as your iPad or your iPhone. Readability is not available for the Mac (except through Safari), so we find that we catch up on important articles in Readability on the iPad at the end of the day.
5/ next, you need a Readability account which you can set up the first time you use the app.
6/ now you need to return to the Reeder app, and you need to sign into your Readability account inside the Reeder application. In the Reeder menu, choose Preferences -> Services and enter your details. This now links Reeder to Readability.
7/ when you open Reeder it will download the headlines for each of your sites, pulling in any news since your last use of the app. When you tap on a headline and read it, it will disappear as it has been marked as "read". If you read the headline and think that you would like to read the rest of the content later, tap on the Readability icon to add it to the Readability app.
8/ you can open Readability at any stage and read the articles you have filed there.
Think of Reeder as a fishing net scooping up all of the headlines for you- and then Readability is reserved for the best of the catch..
OS X Tip: Editing and Updating Contacts
14/11/12 22:35
Many people who use Apple Mail on their Mac have never ventured into the Window menu and looked at the Previous Recipients list. Here is our guide to editing and updating your contacts for use in Mail, on your Mac, iPad and iPhone (over iCloud sync).
Adding contacts from Mail-
Contacts can be added in two ways in Mail:
Method 1: Inbox or Sent mailboxes:
1/ open the Inbox, select an email by single clicking to highlight it
2/ click on the “Add Sender” button to add this person’s name and email address to the Contacts application (on Mac, iPad, iPhone if using iCloud)

To add a contact from the Sent mailbox, hover over the person’s name and click on the white arrow at the end - then choose “Add to Contacts”
Method 2: Previous Recipients List:
1/ open the “Previous Recipients” list form the Window menu
2/ sort the list by selecting the first column- all names will be sorted by status (names with a card icon ARE saved, those without are NOT)
3/ go through the ones with no card icon on the left:

For those with no card- either:
- select them and delete them (if you don’t want this person to pop up when you address an email)
- select them and click on “Add to Contacts” button at the bottom of the window to add them to the Contacts application (on Mac, iPad, iPhone)

Adding contacts in the Finder-
If you have a folder of vCards in the Finder, you can drag and drop them into your list in the Contacts app:
1/ open the folder in the Finder and find your contact in the list
2/ drag and drop the vCard into the Contacts app window
3/ drop it on top of the location where you wish to store the contact
.
Adding contacts from Mail-
Contacts can be added in two ways in Mail:
Method 1: Inbox or Sent mailboxes:
1/ open the Inbox, select an email by single clicking to highlight it
2/ click on the “Add Sender” button to add this person’s name and email address to the Contacts application (on Mac, iPad, iPhone if using iCloud)

To add a contact from the Sent mailbox, hover over the person’s name and click on the white arrow at the end - then choose “Add to Contacts”
Method 2: Previous Recipients List:
1/ open the “Previous Recipients” list form the Window menu
2/ sort the list by selecting the first column- all names will be sorted by status (names with a card icon ARE saved, those without are NOT)

3/ go through the ones with no card icon on the left:

For those with no card- either:
- select them and delete them (if you don’t want this person to pop up when you address an email)
- select them and click on “Add to Contacts” button at the bottom of the window to add them to the Contacts application (on Mac, iPad, iPhone)

Adding contacts in the Finder-
If you have a folder of vCards in the Finder, you can drag and drop them into your list in the Contacts app:
1/ open the folder in the Finder and find your contact in the list
2/ drag and drop the vCard into the Contacts app window
3/ drop it on top of the location where you wish to store the contact
.
Mountain Lion Tips 4- iCloud Documents
17/10/12 21:06
This guides shows how to use Apple’s iCloud storage:
Under Mountain Lion 10.8, you can choose to save your Pages, Keynote, Numbers or TextEdit files on your Mac (same as in the past) or in your iCloud account. Those files are then accessible across your devices. For example, saving a Pages document into iCloud means it is available inside Pages on your iPad, iPhone and Macs.
To turn this feature on:
1/ open System Preferences and open “iCloud”
2/ make sure that the Documents & data option is ticked:
To Save a File to iCloud:
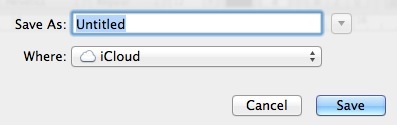
- in Pages, choose a new document and after you enter some text, choose “Save” from the File menu. The default location when saving will now be on iCloud:
Opening an iCloud Document:
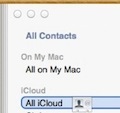
- open your Pages app on any device and you will see a new iCloud page, with all of your Pages files currently stored on iCloud.
.
Mountain Lion Tips 3- VIPs
11/10/12 21:06
This guides shows you how to use the new VIP feature in Mail under Mountain Lion:
The new version of Mail under Mountain Lion 10.8 has a new VIP feature, which helps to gain quick access to important emails from your favourite people, what Apple calls your “VIPs”.
1/ open a message from your first important person, could be your partner, your boss, or a colleague!
2/ move your pointer over the name of the person who sent the email, and look for the small star symbol which will appear to the left of the person’s name:
3/ click on the star symbol to add this person to your VIP list. Now on the left hand side of Mail, you will see a new VIP section:

4/ clicking on “VIPs” will show all emails from those VIPs (combined)
If you click on the small triangle to open the VIP mailbox, you will see a list of your VIPs underneath- clicking on one of the names will display just the emails from that person.
Mountain Lion Tips 2- Sharing
28/09/12 21:06
This guides shows you how to use the new sharing button in Mountain Lion, which is a great way to integrate Twitter and Facebook into your daily use of OS X.
Mountain Lion has added a share button into applications such as Safari, Notes, iPhoto, and Preview.
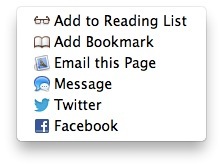
For example in Safari, the share button gives options to post the web address to Facebook, into an email and to Twitter. The Twitter option also allows you to enter a tweet, with the web address attached. Here are the full options for the Safari share button:
 .
.Mountain Lion Tips: 1- Dictation
25/09/12 12:27
We will be running a series of Mountain Lion tips over the next few days, starting today with Dictation.
First it came to the iPhone and iPad, and now to your Mac; dictation is available in OS X Mountain Lion in almost any app. It is not enabled by default, so here is how to turn it on and use it:
1/ Open “Dictation and Speech” in System Preferences
2/ Dictation will be set to off- turn it on and choose your preferred language beneath. United Kingdom is the closest for Irish users.
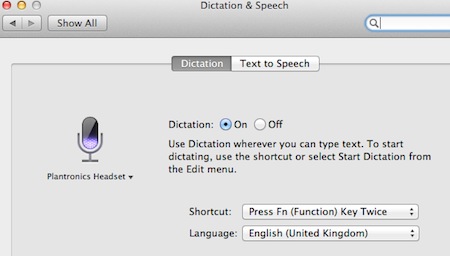
3/ Quit System Preferences
Now to use the new dictation, simply press your “Fn” key on your keyboard twice, and speak after the beep. Then when you have finished speaking, press the Fn key once.
Dictation will then take a few seconds to translate your speech into text. This is done by sending the material to Apple’s servers over the internet and returning with its best interpretation. Words with a blue line underneath may be inaccurate- hold the ctrl-key on the keyboard and click once on a blue line, and you will see possible alternatives.
It is best to use dictation in short sections- don’t dictate your entire email or letter in one go! Try to use Dictation sentence by sentence and see how you get on. .
Apple launch Mountain Lion 10.8
25/07/12 16:33
Today Apple launched the next version of their OS X operating system for the Mac, OS X Mountain Lion 10.8. The new version brings features back to the Mac from iOS devices, such as Game Centre, Notification Centre, AirPlay and Twitter/Facebook integration.
Mountain Lion includes over 200 new features such as:
- New Messages app you can send text, photos, videos, contacts, web links, and documents to anyone using another Mac, iPhone, iPad, or iPod touch - you can even start a conversation on one device and continue it on another
- Share button makes it easy to share files, web pages, photos, and videos, as well as tweet right from the app you are using.
- Reminders app you can create to-do lists and alerts that appear in the new Notification Center
- Notes app is now out on its own, and not integrated (hidden!) in Apple Mail
- Twitter integration means you can tweet right from your apps with the Tweet sheet.
- Game Center allows you to play against friends online using games purchased from the Mac App Store or iOS App Store
- AirPlay Mirroring shows your Mac screen on your HDTV with Apple TV
- Power Nap keeps your Mac up to date while it sleeps so it's instantly ready to go
- Gatekeeper makes it safer to download apps from the Internet by giving you control over which apps can be installed on your Mac
- New versions of Safari and Mail

Full details including a Mountain Lion introduction video is available on the Apple site here.
You can download and install OS X Mountain Lion for €15.99 / £13.99 from the Mac App Store:
Mountain Lion includes over 200 new features such as:
- New Messages app you can send text, photos, videos, contacts, web links, and documents to anyone using another Mac, iPhone, iPad, or iPod touch - you can even start a conversation on one device and continue it on another
- Share button makes it easy to share files, web pages, photos, and videos, as well as tweet right from the app you are using.
- Reminders app you can create to-do lists and alerts that appear in the new Notification Center
- Notes app is now out on its own, and not integrated (hidden!) in Apple Mail
- Twitter integration means you can tweet right from your apps with the Tweet sheet.
- Game Center allows you to play against friends online using games purchased from the Mac App Store or iOS App Store
- AirPlay Mirroring shows your Mac screen on your HDTV with Apple TV
- Power Nap keeps your Mac up to date while it sleeps so it's instantly ready to go
- Gatekeeper makes it safer to download apps from the Internet by giving you control over which apps can be installed on your Mac
- New versions of Safari and Mail
Full details including a Mountain Lion introduction video is available on the Apple site here.
You can download and install OS X Mountain Lion for €15.99 / £13.99 from the Mac App Store: