Adventures in HomeKit: Part 2
Aside from my venture into home lighting this year, I have also looked at other HomeKit devices, including my home gate. During the summer we had a new sliding gate installed and from the outset I had thought about integrating this into our HomeKit system. My goal was to be able to open the gate using Siri on the HomePod, iPhone or Apple Watch.
Gate Industry:
The first challenge here was knowledge- who had it and who didn't. I approached a number of gate installation companies and although any of them would have done an excellent job in adding motor, none of them had knowledge about Apple HomeKit. I had done my homework here and could see that Nice UK gate motors had some information about HomeKit integration. I learnt that the pieces needed to be aligned: a specific Nice sliding gate motor to match the size and weight of the gate, a module to be placed inside the gate motor box to allow a WiFi link, and a WiFi signal which extended to the area around the gate.

For gate motor, I went for a Nice Robus 600 which was a good balance of power and price. I set about installing it at the gate, which involved digging a hole at one side, filling it with concrete and fixing the gate base-plate on top of this, at the right level for the bottom of the gate. This was tricky enough as the motor needs to be carefully positioned so its metal cog wheel is level (to drive the gate) and is in the exact position for the rail. But after a lot of work and repositioning the motor level and angle using the holding bolts, the motor was in place and the gate would slide manually with the lock open. I would unlock the motor with the supplied key, open the lever and the gate could run back and forth.
Electrical Work:
Having installed the gate motor in the correct position, the next steps were the power and sensors. The gate needs its own power supply back to a fuse board and its own isolator switch (you can't just plug it in with an extension cord!). This was the trickiest part- I needed to run cable through outdoor ducting across the drive and then outdoor electrical cable needed to pass through our garage to outside the back door. In the end this cost about €150 for one hours work by a local digger driver and handyman.
The next part was the electrician. There was no way I would attempt this myself. This needed an electrician to link the cable through the wall at the door and into the house to the fuse board. He connected it into the board with its own trip switch, and the line out now has its own switch to power on/off the motor. This was important as during the programming stage, the gate needs to be powered on and off at various times.
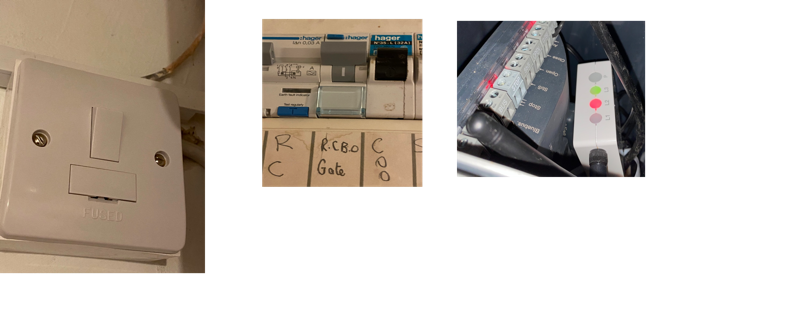
Isolator switch near back door : trip switch on fuse board : WiFi module (IT4WIFI) in gate box
Sensors, Programming and Accessories:
The electrician connected the cable to the Nice motor and once I knew I had (safe) power connected, the rest was over to me. I needed to install the two photocell sensors, which create a beam between each side of the gate. If broken, this signal would stop the gate from closing (for example is a person or car passed through as it was closing). Two photocells came with the motor kit and so I set them up on either side of the posts and linked them back to the “Bluebus” port on the Nice motor.
The final stage before activation was the programming. Nice UK have a number of helpful videos on YouTube which were invaluable. With the gate running smoothly on its rail in manual mode, and with the photocells linked, it was time to turn on the power and go through these steps. The gate has metal stoppers at either end, so the gate can be programmed to know where it runs to. Holding down a few of the buttons on the panel, the gate performs its initial search sequence, running back and forth to learn its end points. Now the gate was ready, and I could open and close it using the open/close buttons on the panel.
Remotes:
I also went the old fashioned way- I bought some remote controls for the gate. These are set up in two parts- first by plugging their radio module into the motor panel so that the gate has a receiver for the remotes. Then each remote is paired with that module. At tis stage I could now open ad close the gate, and be assured that anything breaking the photocells' beam would stop the gate in its tracks.
WiFi:
The next step was to add the gate motor to the house WiFi to add it to HomeKit. Luckily my office WiFi network extends far enough to give good coverage at the gate. I bought Nice's IT4WIFI aerial which plugs into the panel on the motor and lives inside its waterproof plastic covering. This was a simple step as it uses a telephone cable (RJ11), running from the small aerial box to the panel. After this I used the Nice Welcome HK app to add the gate to my network and I had a WiFi controllable gate.
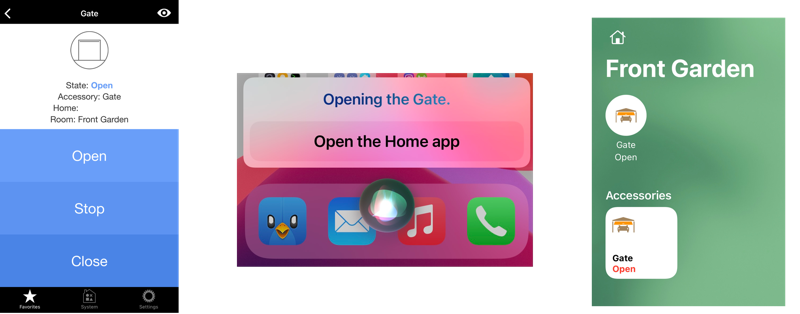
Nice Welcome HK app : Using Siri on iPhone to open the gate : Home app with the gate status
HomeKit:
I could have skipped the Nice Welcome app and gone straight for HomeKit, but I decided to have both. The final stage was to add the gate to the Home app on my iPhone, to assign it to a "room" and name it. This final step integrated the gate into the rest of my home accessories, including lights, dehumidifiers, power sockets and heating.
Now I can activate the gate using my iPhone or Apple Watch by saying: "Hey Siri, open the gate" or "Hey Siri, close the gate". I can ask "Hey Siri, is the gate open?" to check if it is shut at night. One of the best parts is the remote access, and the ability to open the gate as I approach my home in the car. As my Ford has CarPya, and a Siri button on the stalk, I can press the button and say “open the gate”.
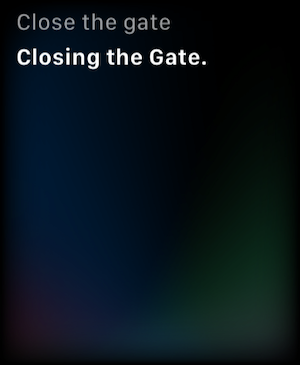
Using my Apple Watch is also great- by holding in the Digital Crown, I can ask Siri to “close the gate” and off it goes. So simple and effective- no messing around with zappers or even apps.
The only slightly fussy device is the HomePod in our kitchen which insists on me “authenticating” on my iPhone before it will complete a gate request, possibly as a away to ensure the person speaking is allowed to control the gate. I can see this as a useful safety feature.
I will need to check the photocells frequently and the gate may need to be serviced every few years, but overall this project was very rewarding and I succeeded in integrating the gate motor to the rest of my HomeKit system.
2020: The Year of Apple HomeKit
One of my favourite distractions during the lockdown of 2020 has been HomeKit, the home automation software from Apple. Over the last few months I have changed my home setup over to make my lighting fully automated and all under the one app: Apple’s Home app on macOS and iOS.
HomeKt is a software framework which was introduced in 2014 and was originally for developers to start integrating their home devices. As manufacturers of light bulbs, locks and thermostats, to name but a few, started to add HomeKit support, Apple improved its iOS Home app for users to control their home. In recent years I started to dabble with it, but really only when necessary, such as setting up my pair of Apple HomePods which can only be set up with the Home pap.
But at the start of 2020 there were enough new devices to tempt me into using Home app full-time for my home controls. Here is what I discovered and how I set up my house’s lighting system and power sockets.
The Basics:
To use the Home app with HomeKit compatible gadgets, you need a “Home Hub” device. Apple use this Home Hub to connect and communicate between the various gizmos in your house, including the ability to control them remotely. You can turn your lighting or heating on or off when you are away, linking back to the lights through your internet connected Home hub.
An example of a Home hub device is an Apple TV, a HomePod, or an iPad. The Apple TV and HomePod work well as they require very little, other than being plugged in and set up for normal use. The iPad can work as a Home hub but it’s not as convenient; it would need to be left in your home and plugged into power.
With one of these Home Hub devices in place, you can then set up your house in the Home app (Home -> Hubs & Bridges). All you need to do is be signed in with your Apple ID, choose which device is going to be your Home Hub (select one from a list if you have multiple compatible gadgets) and then you are ready to add new accessories.
Accessories:
Up until 2020 I had played with a few home-internet devices. I own a Google Nest thermostat and a Nest Camera, and I have used a few Koogeek WiFi plugs, which works fine as a way to turn on certain lights. But the issue was that none of these talked to each other and all used their own proprietary system (and apps). I have to use the horrible Goole Nest app for the thermostat and camera. For the plugs, the Koogeek app is fine and works well for simply turning plugs on and off, but it isn't integrated with HomeKit and so cannot be used with Siri.
I had three systems: Google Nest (Thermostat and camera), Koogeek (WiFi plugs) and HomeKit (HomePods). But the only one which would work with Siri was HomeKit compatible devices. While everything functioned well, the lack of compatibility and a concern about security meant that it was not the ideal setup. HomeKit is designed to protect the user and, with gadgets such as cameras and locks being automated, it is worth reflecting on which system you trust.
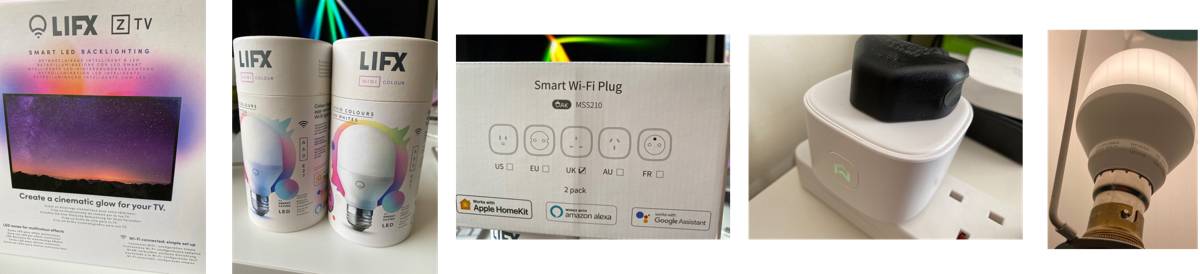
From L-R: Life X Backlighting strip for a TV, two LIFX bulb packs, Meross Smart WiFi Plugs box, a Meross in use with button on top for manual on/off, a LIFX bulb in our lamp
Making the change:
Lighting-
My HomeKit adventure began with light bulbs! I had watched the price of these bulbs and decided to move now as new HomeKit bulbs were available at a reasonable price. The other reason for installing them was because of the range of colours that these LED bulbs could offer.
Having looked around at different manufacturers, such as Philips and Koogeek, I settled on LIFX bulbs having watched some reviews and setup videos. They are a good price, are long-lasting, are cheap to run, and have a great range of features that are compatible with HomeKit and Siri.
I bought three types of lights from LIFX:
- LED strip lighting for behind our TV, above kitchen units and behind our hall bench
- screw-in E27 bulbs and B22 pin bulbs for different lamps around the house
The bulbs are very simple; they’re WiFi connected bulbs which means they are slightly bigger than an old-fashioned bulb, but around the same size as some low-energy bulbs. They are heavier, but this was not an issue in the lamps. The major difference is the cost: each bulb costs around €30-35. It all adds up if you decide to change your whole house, but I took it room by room to test the product and decide if it worked the way I wanted.
WiFi Plugs:
For WiFi plugs, I went for pairs of Meross units, which are simple to use and a reasonable size. They cost about €20-25 for a pair of plugs. The biggest problem with any of these units is the size of the WiFi plugs. Almost all WiFi plugs will have trouble fitting into extension 4-bars along side other plugs. But I had no trouble with them in dual-wall sockets. They look a bit clunky, and so may work best when positioned behind furniture rather than on clear wall sockets. They’re not bad, but they stick out a bit with the devices plugged into them.
I wanted a few of these for other units, such as dehumidifiers and cameras, and they’re perfect for turning on/off any powered device. One caveat- don’t rely on them for your TV or other sleep-mode units. You may be able to power the unit on and off with a WiFi plug, but the TV is likely to remain in sleep mode and not fully power up. The same is true with some radios, dryers, washing machines, etc.
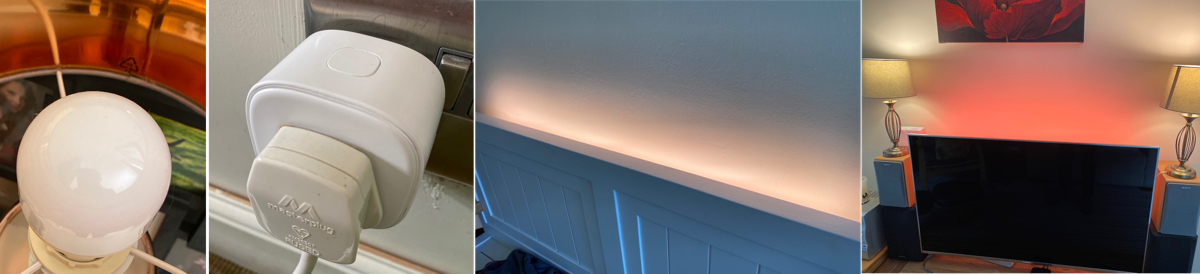
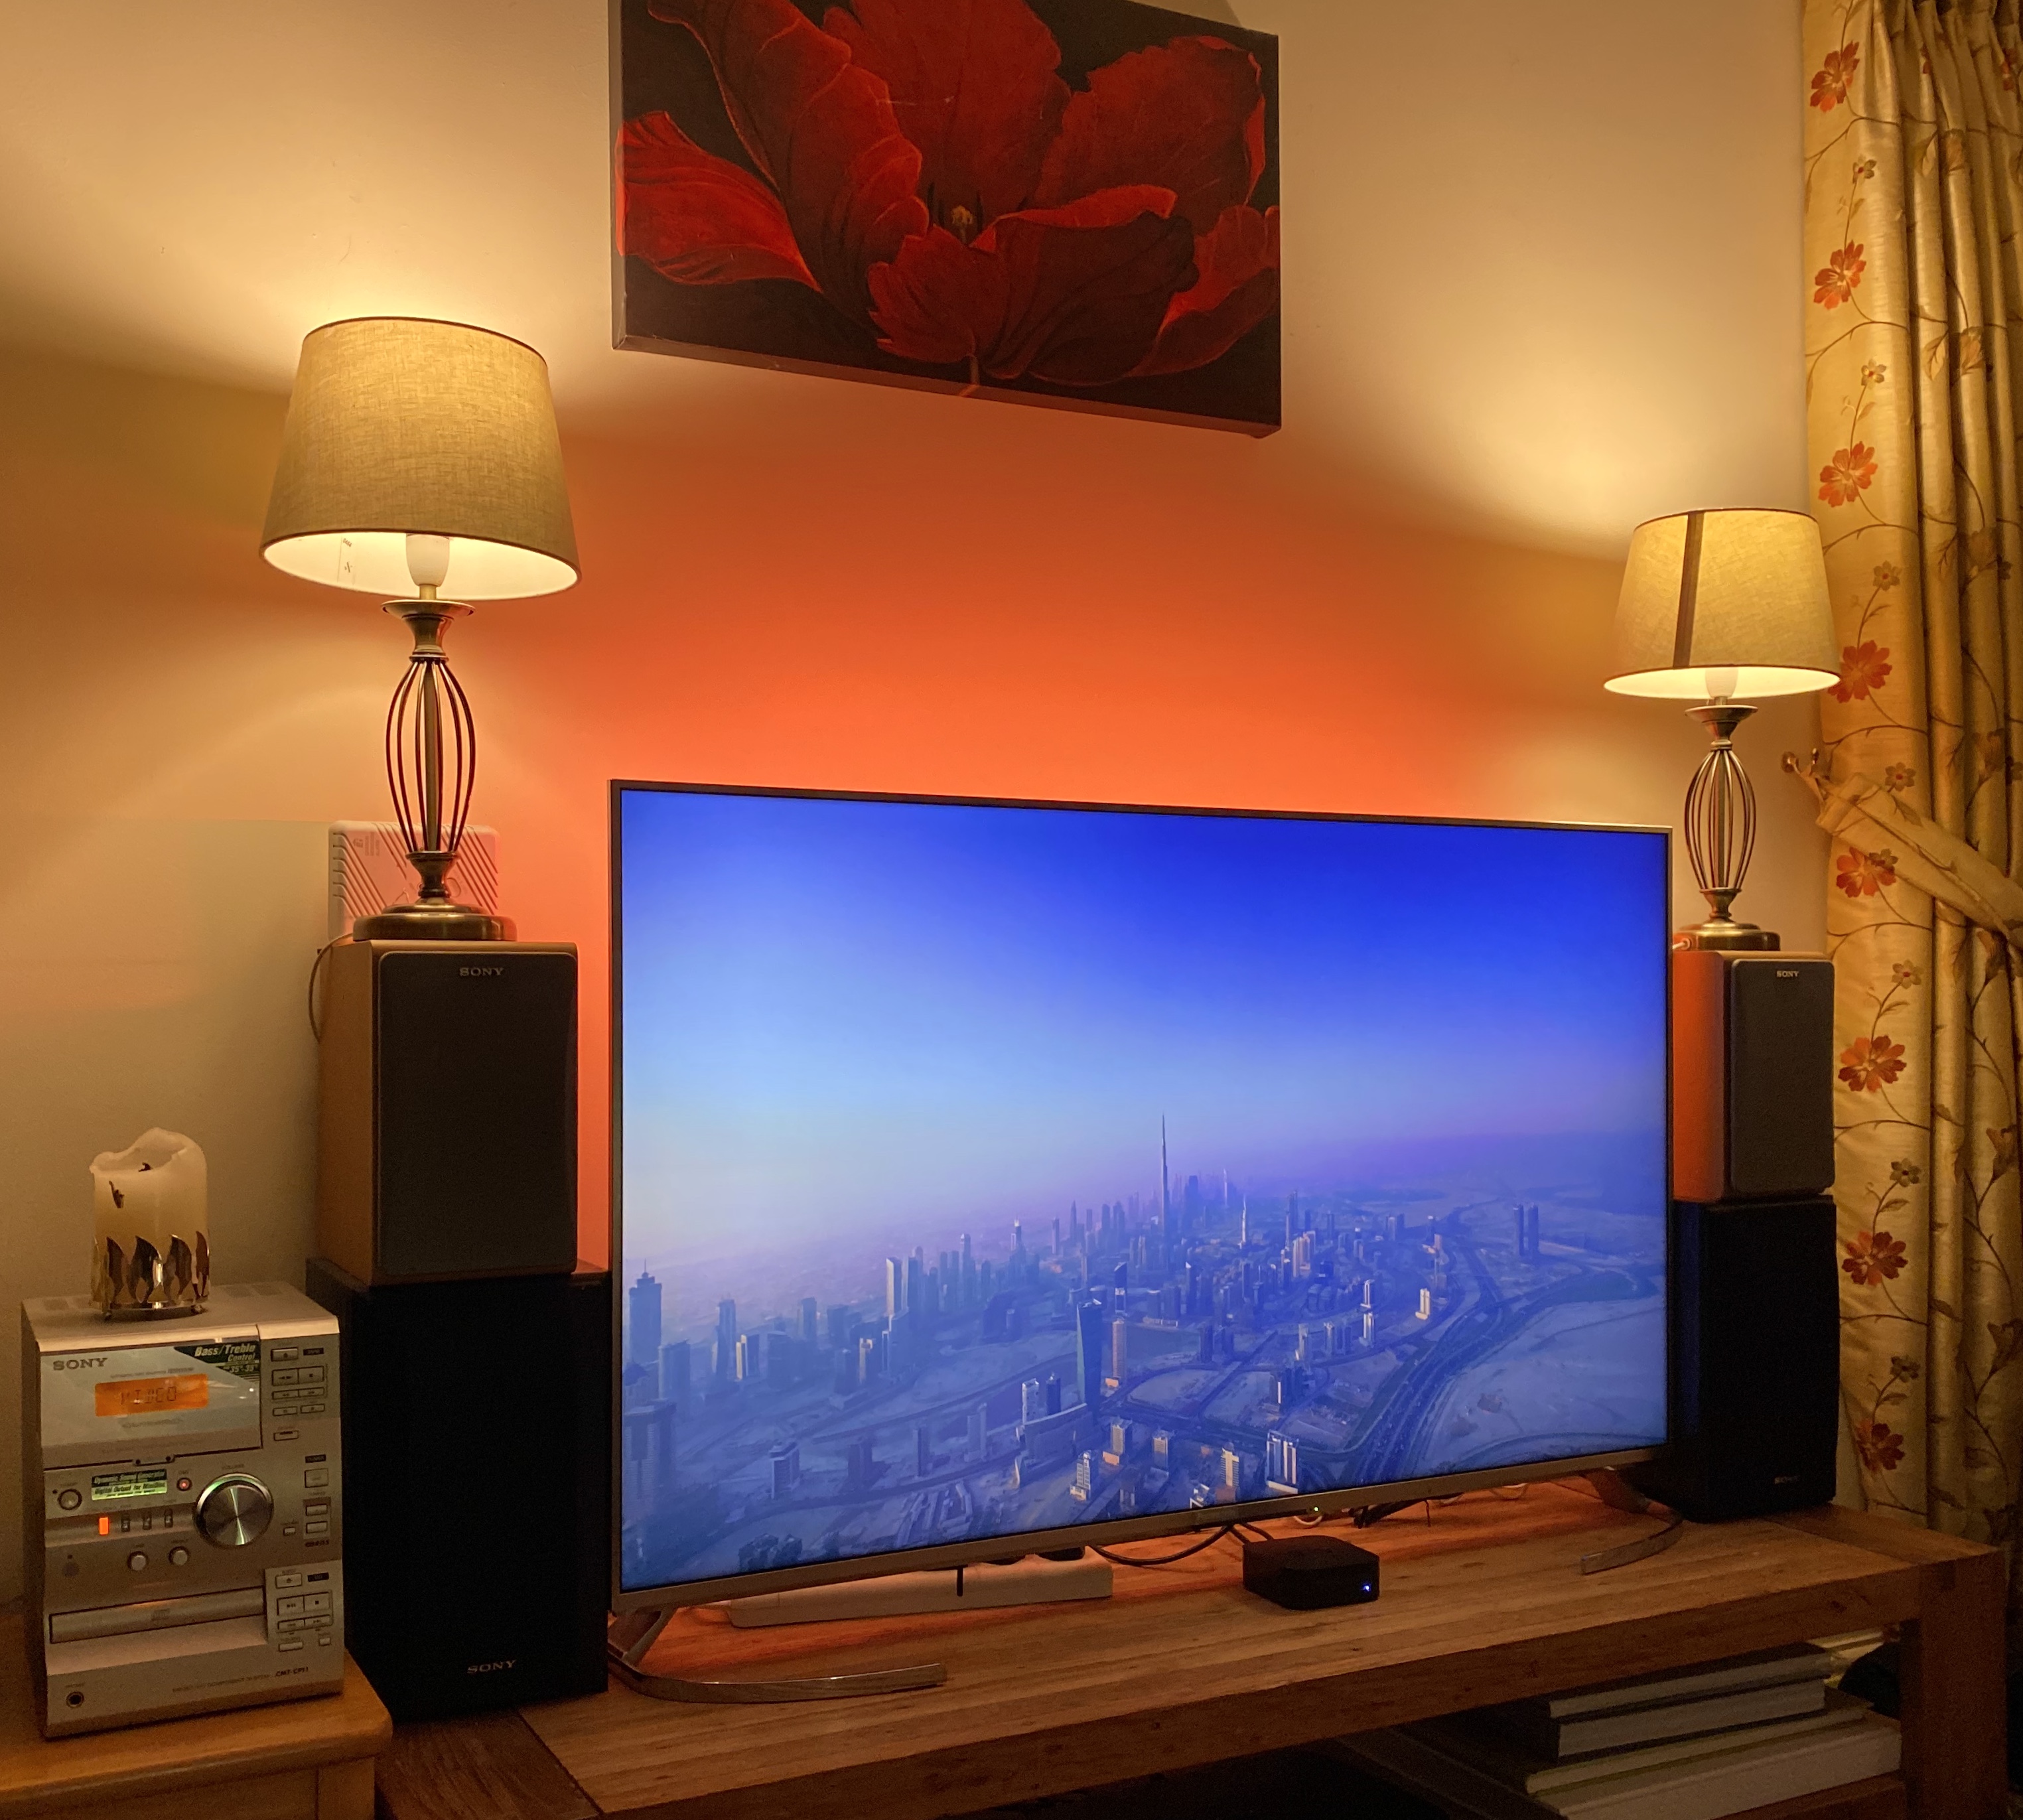
From L-R: LIFX bulb, Meross plug in use, light strip behind hall bench, light strip set to red with white light bulbs around TV
Set-up:
The setup process was very easy, and you can do it two ways-
1/ using the Home app: Apple make this very painless. All HomeKit compatible devices come with a QR label on the packaging. You open the Home app, tap the “+“ button and choose to "add accessory”. On the following page, the camera scans the code to begin to add it to your system. That’s it; the Home app gives the device the WiFi connection to join your home network and you reach a page in the app where you can name and choose options for the device. For example, you can choose to add the device to a room in your home, you can name it so in the future you know which device you are controlling, and there are some device-specific options, such as setting a light-bulb colour.
2/ the other option is to use the manufacturer’s app. I would recommend you set up the device with one, and then you can use both to explore the features. Sometimes the manufacturer’s app has a few extra options and settings. I like the colour settings in the LIFX app more than the options in the Apple Home app. The Home app has a simple colour palette, whereas LifeX has colours plus a range of multicolour “themes” with extra colour effects.
Ideally, set up your devices in one and then explore both apps. Then you are set to control your home devices using whichever app you need or prefer. I normally use the Home app all of the time, but have the other apps for specific tweaks.
Aside from the initial setup, you can also group your devices. For example, we have two lights either side of our TV and one strip light on the back of it, so I grouped these three into one “TV" set. That way when you choose a colour, you only have to set it once for this group of 3 bulbs.
Rooms:
In the Home app, you set up the rooms of your house so each has its own page, and then you assign each new device to a room. It is best to get your room names sorted at the start, so that you can then allocate the devices as you add them. In the Home app you swipe left or right to move through each of the room pages.
Siri:
Voice commands are one of the best parts of the HomeKit system, and these can be used on an iPhone, iPad, HomePod or Apple Watch. I can tell Siri to “turn on the lights in the kitchen” and all lights in that room come on. I can also ask Siri to “turn on the lights” to light up the whole house, or be more specific and ask to “turn on the lights in the kitchen and in the living room but not the bedroom”. Siri will also increase the brightness if you ask to “turn the lights up 30%” etc, or change colour by saying “set the living room lights to yellow”.
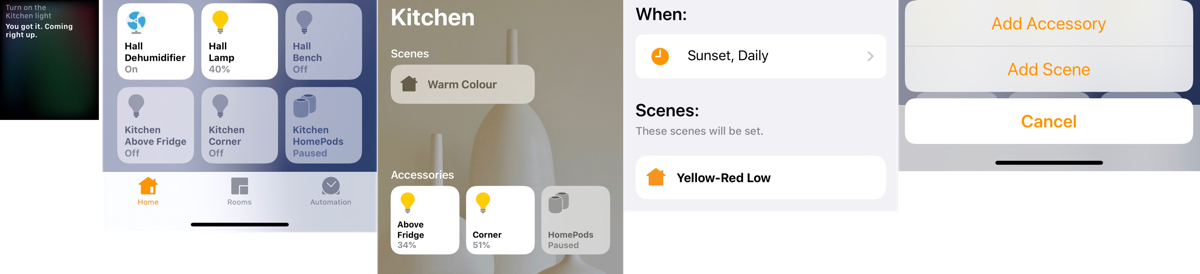
From L-R: Apple Watch Siri common, Home app front page, Kitchen room page, Automation command for Sunset, Adding a new Accessory or Scene
Scenes:
What’s even more effective is setting “scenes”. You can gather various types of devices into a “scene” which could include different settings- for example to set all lights in the living room to 65% brightness and set them to a certain colour. This way you can set up your perfect lighting across rooms, your favourite colours and brightness, and save it as a scene for the future. No-one needs to be constantly setting devices and trying to remember the particular colours and tones, so adding 2-3 scenes for different lighting conditions and times of the day is a great way to set up your home. This can be combined with other devices- so saying “arriving home” to Siri can be used to trigger lights, open locks, start music and turn on gadgets around the home.
Remote Access:
One of the best parts is the control of the system from anywhere in the world, using your internet-connected iPhone and Home app. Looking at the Home app when away, you can see what is turned on and you could turn on a few lights to give the appearance of someone at home. With a HomeKit enabled thermostat you can set your heat to turn on as you depart, so you can return to a warm house. HomeKit can also add sliding gate motors by companies such as Nice so on your return you can ask Siri to “open the gate” as your approach.
Automation:
Apart from Groups and Scenes, Automation is the best way to have your lights and gadgets turn on or off at certain times of the day. Devices can be grouped into an Automation so they are set to come on at a time, or turn off late at night. This can be aligned with sunrise and sunset, or at a specific moment in the day.
Overall:
At the end of all of these changes the main difference is the colour in the rooms from the LIFX bulbs, which give the house a warmer feel than the harsh LED white bulbs. The combination of the strip lighting and bulbs gives a good combination light direction, and being able to turn the whole set off in one voice command is excellent. My favourite part- turning all of the lights on or off simply using my Apple Watch. I hold in the digital crown in and ask Siri to “turn on the lights” and that’s it- the entire house lights up.
My intention is to get our sliding gate motor integrated this month, so will update this article to let you know how that goes…
For more detail from Apple on the Home app and HomeKit compatible devices, check out their Home page: https://www.apple.com/ios/home/
For Life X bulbs and lighting strips: https://eu.lifx.com
For Meross WiFi plugs: https://www.meross.com